Wednesday, 8 August 2012

Reaper Bones Dwarf: Review and Painting project


I was talking to a great friend of mine the other day and he complained that his local Games Workshop never had a Dwarf that he thought represented his D&D character properly.  So after preaching passionately about how GW isn't a Roleplaying miniature manufacturer anymore (boo, hiss, shame!) I had a look for something for him.

Click to Zoom
What I found was the Reaper Bones series Dwarf.  I was vaguely aware of the Bones range but hadn't bought any yet and thought this would be a great excuse.  Reaper seems to be doing the exact opposite of Games Workshop.  They have an extensive metal range of models geared towards Roleplayering and are bringing in a range of Plastic miniatures at a incredibly low price.  The Dwarf I bought cost me £2.08 including postage from Ebay (you have to buy £30 worth to get worldwide free postage from Reaper).

So Games Workshop introduced plastic figures to replace the majority of their metal products and over time have increased the price....a lot.  Reaper are bringing in a Plastic range and are dropping the price....a LOT.

Click to Zoom
Hats off to Reaper.

Now onto the model it self.  First impressions are that the quality is exceptionally good for a plastic miniature.  I had to look really hard to find the mould line.  The plastic is pretty soft which should make conversions a piece of cake.  Finally the plastic is white, and its claimed by reaper that you can paint it without primer, i'm not sure I would choose that route myself as I think the paint would flake off over time.


So thats all for now, I have to go to work, but i'll prime this one later and see how well it comes out.  Watch this space.

Tuesday, 7 August 2012

Photographing Miniatures and Post Production

Before
I've been trying to take decent photos of my miniatures for ages, with very little success.  So today I've been reading and watching all kinds of tutorials and experimenting and I'm going to share what I have learned, and the results of those experiments.

After
Now before I start I want to explain a few limitations I'm under, and you might be too so it is relevant.  I don't have an expensive camera, its a Fujifilm JX530 14mp family camera.  And even though its 14 million pixels that's not much use when taking photos of miniatures, I can't adjust the Aperture (which affects the depth of field for focusing) or manually focus shots (which is really annoying) but it is good enough for my purposes.
I don't have a lightbox, this is a Matt white box that reflects clean light back at the model, but I do have two clip on lights (with normal bulbs, more on that later).  A lightbox would be useful and I might get one soon, but its not as important as a camera I can focus manually.

So on to what i've learned.  First and foremost your miniature needs to be very well lit to get the best results.  I'm using normal incandescent bulbs and the light they give is very yellow so I really need to get some Day Light bulbs.  

Set your camera to take the lowest ISO level it can, turn off the flash and if it has a Macro function (the symbol is a little flower) turn it on.  If your camera has a delay function (so the photographer can run round and be in the picture) use it, hand shake can ruin a good photo.

Theres a lot more detail in this tutorial by a very clever man at the Tiny Tin Men blog.


So you've taken some shots and they are in focus. Next is turning them from the creamy 'Before' images on the right into the much more professional looking ones marked 'After'.   As always, click each picture to zoom.

Before
After

Theres no great secret, just download a program called Gimp.  Its free and will let you fix the white balance (correcting those incandescent bulbs yellow light), add frames, resize and apply backgrounds like a pro.


Before
After

Now I can't tell you how to do those things any better than this video can, hats off to this lady, she explains it so clearly even I got it (after watching several times).

Before
After


I really hope you have found this useful.  I'm delighted with the results and if you follow the tutorials I have suggested I'm sure you will be too.

Monday, 6 August 2012

Painting Tau Fire Warriors, inspiration from nature

Click to Zoom
I was looking through my box of prepared miniatures for something to paint as its still raining and I can't get my Nazi Zombies ready.  And I found a Tau Firewarrior I picked up ages ago.  Its an interesting model, the Tau weren't released when I used to play WH40K so they have some novelty factor for me.

I really like the insectoid look their armour has and the single eye/rangefinder.  Add the more dynamic pose this one is in and I couldn't resist painting it.

When choosing a colour scheme I knew I wanted to go for a yellow and black Tau so I looked at photos of insects for inspiration.  I liked the idea of natures warning colours of yellow & Black which I hoped would give the figure an air of threat.  

I didn't want it to look too orange though so I highlighted it quite heavily.  I also used a brown wash to low light and pick out the deeper lines.  I wanted a shiny black look for the cloth trousers and gloves which kind of worked but I think i'll need to get some gloss varnish to make them look the way I want them to.


I also liked the way the yellow on the bug in the above photo looked with the green background so I chose that for the contrast colour.  Overall i'm pleased with it although the barcode rank markings just didn't come out that well.

Sunday, 5 August 2012

Painting faces on Miniatures: A step by step guide

I am the first to admit I'm not a real artist.

I can't look at a landscape and paint it or sketch a friend's face and have it be recognisable.  But to get respectable results for miniatures that's not really essential.

I'm not great at faces, but they are important so I've practised as much as possible and have picked up some techniques and tricks to make it easier on me and I thought I'd share them with you.  Bear in mind this is not a guide for the experienced painter but for us happy amateurs. 

Step 1: Base Coat

Base coat the face with a lightly tanned flesh tone, Citadel Eldar Flesh is a good base for most models.  Be sure to keep the paint fluid or it will clump up and obscure the detail.  Wait for it to dry before you do anything else or the colours will bleed together. The exception is if you want to blend but that's a whole other step by step guide and not really a beginners technique.


Step 2: Wash

Then once its dry wash with a watered down brown wash (not Flesh wash, its too yellow for my tastes).  Your wash should run into the deeper parts of the face and help show up the details.  If your wash has too much water those details won't show up, if it has too much paint it will just cover them anyway.  Its better to err on the side of caution and if you go wrong just load up your brush with water, add it to the face and use a dry brush to soak it all up.  

Step 3: Highlight and Contour

Again once its dry pick out the highlights with a lighter flesh tone, the forehead, the blade (the bit that get sunburned!) of the nose, the top lip between the nose and lip, the ball of the chin and the cheekbones. Allow the highlights to dry or if your particularly ambitious try blending the contour or low light colour with the highlight while its still wet.  You can see on the photo to the left the highlights and low lights are shown.


Step 4: Detailing

The last step is to add in those tricky bits like eyes and lips.  You can add an even lighter highlight if you wish to the ball of the chin, cheekbones and forehead too.  

Lips are generally pinker than you think, just add a tiny bit of blood red to the Eldar Flesh you used earlier and mix it together.  Paint a thin line over the bottom lip only, top lips very rarely show on miniatures except large models and some females.  

The best way I've found to do eyes is to paint the eye socket with black, layer a strip of off white on top leaving a little of the black showing around the edge.  Finally dot a pupil in black and be careful to get them lined up together or your model will look cross eyed!

The last detail is makeup for females, a light red wash over cheeks for rouge, the same for eyeshadow, just choose a colour that complements the model's paint scheme (earthy colours look very good for this as does blue or green).  To paint lipstick I draw a Scab Red line over the bottom lip, highlight with Blood Red and finally dot a little white into the middle which makes it look shiny.

I hope this guide has helped you, if you would like any clarifications or more details please leave a comment.


Saturday, 4 August 2012

Games Workshop Warhammer Miniatures: Frankly a bit of a rant

When I started painting figures it was Games Workshop that got me hooked.  They had a fantastic range of miniatures which were painted to perfection and showcased in White Dwarf magazine by the Eavy Metal staff artists.  The figures were fun and you got some really unusual models sometimes.

http://miniaturesforroleplaying.blogspot.co.uk/
Dwarf with an inferiority complex

For you younger painters it might seem perfectly normal that they only make miniatures for use in their own mass combat games now but it wasn't always that way.  Back in the 80s Games Workshop used to make some of the best figures for roleplaying around.  Generally figures came in blister packs with three random models from each range.  So if you bought a pack from the range 'Fighters' you would be able to look through the blisters and pick the set with the three figures you wanted.

http://miniaturesforroleplaying.blogspot.co.uk/
Games Workshop Mordheim Elf Mage
Now of course those days are past and everything is geared towards the Warhammer mass combat games.  With the notable exception of the Mordheim skirmish game.  There are some very good figures made for that game like the Elf Mage on the left.

http://miniaturesforroleplaying.blogspot.co.uk/
Great Value from Reaper Miniatures 
Which brings me to the rant part of this post.  That single figure costs £8.20 +£3.00p&p.  Thats £11.20 for a single figure!  To put that into perspective you can get the Reaper Miniatures figure on the right for under a fiver including postage.  And this is not an isolated issue, Games Workshop figures, despite now being mostly plastic have rocketed in price.  I'm rather glad I use figures for Roleplaying and not for Wargaming or i'd be perpetually broke.


As I doubt i'll be buying many Games Workshop figures in the future (mainly because they are geared towards battles rather than adventures) I thought i'd post some photos of a miniature I painted for my local games store many years ago.  I hope you enjoy them.


Tabletop Terrain: Battlemats, Floortiles or Scenery?

http://miniaturesforroleplaying.blogspot.co.uk/
Click to Zoom

Ok so you have a huge collection of miniatures, they're painted and based and look fantastic.  But that's only half the story, what are you going to use to represent the world they are moving around in?  Being able to see where each character is in relation to the others is a huge tactical advantage and can really help everyone become immersed in a game but if no one can tell where the walls in a dungeon are you aren't going to get very far.

Well luckily there are a wide variety of solutions for you, ranging from the incredibly cool but expensive to the function but cheap, I thought i'd share my views on some of those solutions and share some that my friends have come up with.

1. Resin Terrain.

http://miniaturesforroleplaying.blogspot.co.uk/
Click to Zoom
http://miniaturesforroleplaying.blogspot.co.uk/
Click to Zoom
There are quite a few manufacturers who create detailed modular miniature scenery that can be linked together to create dungeons and towns.  Dwarven Forge is probably the best known and they have an amazing array of rooms you can use.  The come pre-painted to a very good standard but unfortunately aren't cheap, a 12" by 18" set of basic stone flagged floors costs $69 +carriage and a 6" by 2" corridor with walls is $15 each.  The other drawback is in order for them to accurately represent your Dungeons you either have to have a huge collection or design your dungeons around the rooms you own, that can stifle your creativity.


For me Dwarven Forge is the terrain I would use if I had a big budget, it looks fantastic but isn't for those on a budget.

2. Using a Computer Monitor or Virtual Tabletop

http://miniaturesforroleplaying.blogspot.co.uk/
Click to Zoom
http://miniaturesforroleplaying.blogspot.co.uk/
Click to Zoom
This is a mapping solution one of my friends used with very impressive results.  Its technically challenging and could be quite expensive but most Roleplayers own a computer so the monitor/HDTV is the real cost.


There are various free or inexpensive computer programs that will help you create floor plans and maps for your miniatures to adventure in and the big advantage I see is that the Gamesmaster can restrict what his or her players can see to what their characters can.

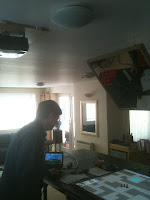
An alternative is to use a projector with an overhead mirror (see above right) to transfer the image directly to a normal tabletop.  However projectors aren't cheap either so it might not be the best solution unless you already have access to one.

3. Really Creative!


http://miniaturesforroleplaying.blogspot.co.uk/
Click to Zoom
http://miniaturesforroleplaying.blogspot.co.uk/
Click to Zoom
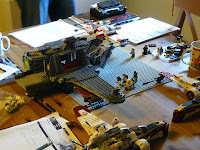
The same friend who worked with the Virtual Tabletop idea also came up with a very creative solution. Lego!  His Star Wars game was brought to miniature life by using the rather excellent Star Wars Lego collection and building the scenes accordingly.  


I imagine his players had a great time building their miniatures and that he enjoyed building the sets just as much.  While i'm not sure Lego would be the right terrain choice for a Fantasy game it really works for Star Wars.  From the photos you can see the level of effort he achieved and i'm sure his players had a blast.

4. Battlemats, Floor tiles and Card Scenery

http://miniaturesforroleplaying.blogspot.co.uk/
Click to Zoom
http://miniaturesforroleplaying.blogspot.co.uk/
Click to Zoom
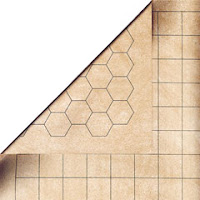
This is the cheaper option and one that I personally use.  Battlemats can range from simple hexed or squared wipe down surfaces like the Battlemat range from Chessex to intricately drawn maps.  The wipe down maps are great for tactical games but don't really look very appealing compared to decent maps or terrain.

We tend to use card stock floor tiles cut into common lengths which are laminated and put together to create the dungeons.  The advantages are that they are cheap, once you've built up a small collection you can build most dungeons easily and as they are laminated you can draw on them with dry wipe markers during combat.  We also add a few 3D items like doors, tables and treasure chests from the old Heroquest game.

I've found that the free download sets from the Dungeoneering.net site are a great start and the Dungeons & Dragons Floor Tiles packs are still available at reasonable prices.  If you add a few 3D pieces of scenery to these sets you can get a decent result.   

http://miniaturesforroleplaying.blogspot.co.uk/
Click to Zoom
http://miniaturesforroleplaying.blogspot.co.uk/
Click to Zoom
The last thing I wanted to suggest was Card Scenery, suppliers like World Works Games offer some really professional card stock 3d sets for just about any setting from Wild West and Science Fiction to Classic Dungeons.  The quality is excellent, the prices are reasonable and they have the added advantage of not being too heavy or bulky for storage.

In fact the Wild West set has me very tempted to paint some cowboys!


Thursday, 2 August 2012

Painting Player Characters for D&D: Wood Elf Archer with Scenic Base


Dungeons & Dradons, Wargaming, Miniature Painting
Warhammer Wood Elf Archer

My West Wind Zombies arrived today but its raining so I couldn't get them prepared and primed.

Dungeons & Dradons, Wargaming, Miniature Painting
TSR Gnoll from 1985
So I went looking for a model that i'd already prepared but hadn't gotten around to painting.  I normally have a few miniatures like this and today I narrowed it down to a really nice TSR 1985 Gnoll Warrior I picked up at a car boot sale or a converted Archer from the rather ancient Warhammer Wood Elf Chariot that i'd pinned to a piece of rock.  I had also put on a wire bowstring which I have wanted to try for quite a while.

I've also recently received some lipped 30mm bases so I decided i'd rebase the Gnoll and paint the Elf.  The Elf's pose is really nice and fitted the rock i'd found perfectly and i'd been meaning to paint it for ages.  I always wanted it to represent one of my favourite characters from a Dungeons & Dragons game 
If your anything like me you probably invest a lot of time into your tabletop characters. Whether its a heroic Paladin with a dirty little secret in his past, a Pious Cleric with delusions of grandeur or a solitary Elven Archer with a real passion for killing humans we exert our creativity to develop a three dimensional personality to be our avatar in a shared world of adventure, horror or action.

Click to Zoom
For me its very satisfying to put some effort into painting the miniatures that represent our characters so I painted this one in a slightly different way to the Zombies I did in the last post.  Most of the steps are the same but I rely less on black washes and shade more subtly.

Click to zoom
I used Vallejo 70.873 on the boots and Vallejo 70.924 on the leggings, these paints give a muted earthy tone quite different to the Citadel paints I normally use.  Eldar Flesh was the base coat for the skin areas but I wanted him to look a bit outdoorsy so I used a very watered down Citadel Bestial Brown as a wash.  I wanted the bow to be white and its deceptively hard to make that look deliberate, shading with light grey and highlighting with pure white was effective and picking out the bow string with Shining Gold got the effect I wanted.

I was tempted to leave the rock unpainted but that just didn't work.  When you paint miniatures you over emphasise things and an unpainted rock would hav elooked realy odd.  I settled with a basic Citadel Fortress Grey base coat with a black wash and white dry brush layer over the top.  Some standard green flock did a nice job as mountain lichen to bring some colour into the base and draw it together with the greens in the miniature.

I'd be interested in your comments.